How to use DuckDNS on an Huawei EchoLife Router

DuckDNS is a service that allows users to turn their dynamic IP address into a subdomain which they can use to access services on open ports. The following is the method I used to configure DuckDNS to automatically update using the ISP's Huawei EchoLife router. DuckDns is not supported by default on these routers, so the following is the steps that I took to make it work. At the time of writing this, the system has been updating for 3+ months without fail.
More information about DuckDns can be found on their site: https://www.duckdns.org/about.jsp
Setting up the service
-
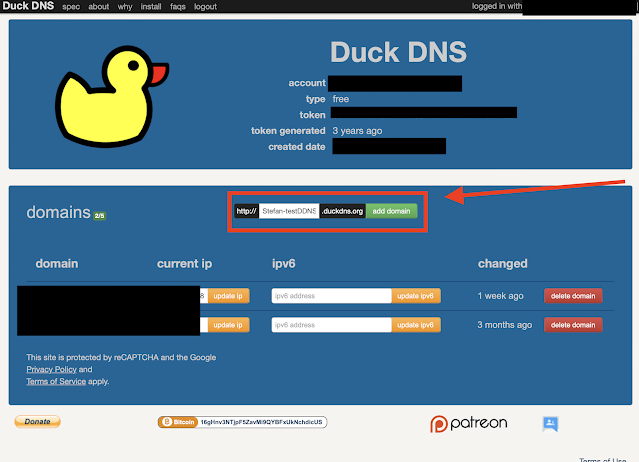
Go to https://www.duckdns.org and create an account or sign in.
-
Create a new subdomain (Enter the subdomain you wish and click 'add domain'
-
Copy the token
-
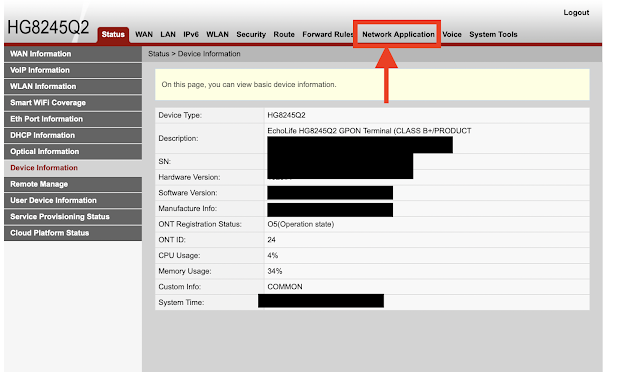
Log into your EchoLife ONT
-
Navigate to the "Network Application" tab
-
Select 'DDNS Configuration' on the left side then click 'New'

-
Input the settings for DuckDNS
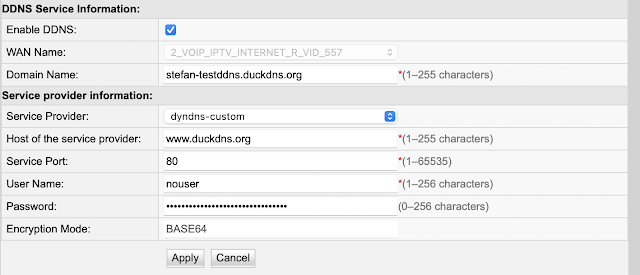
Check the "Enable DDNS" box Select the correct "WAN NAME" in this case "2_VOIP_IPTV_INTERNET_R_VID_557" Input your full DUCK DNS domain name (that you created in step 2) "Service Provider" is set to "dyndns-custom" "Host of the service provider" is set to "www.duckdns.org" "Service port" is set to 80 "User Name" is set to "nouser" "Password" is set to the "token" from duckdns.org
-
Click Apply
-
After several moments, you should see the service appear under DDNS Service State as "UP"

-
Your IP address should now be visible in the duckdns dashboard.
